
Theme Options & Customizer
There are two areas where you can adjust specific settings for your website.
Let’s look at each one and how you can use them to adjust your website’s content and appearance:
Theme Options
Within the theme options, you can adjust two options:
You can get to the theme options by going to Appearance > Theme Options from your website’s admin dashboard.
Site Alert
The site alert is an alert that you can activate for your website to inform users of information that is important for them to be aware of. Unlike the state alert, which is activated by ETS for state-wide announcements, this alert is specific to your website, so you have complete control over its content.
Here are the options you can access with your site alert:
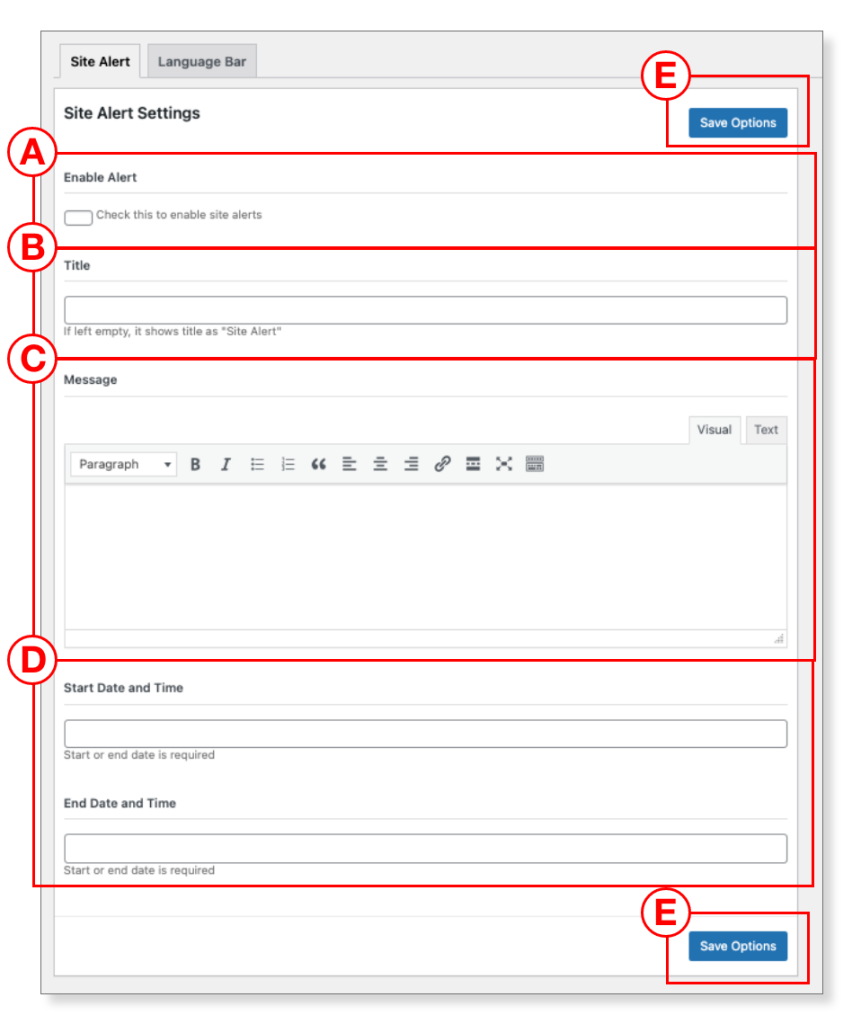
- A. Enable Alert: This turns your site alert on and off.
- B. Title: This is the title of your site alert.
- C. Message: This is the content of your site alert. You can add links, style your text, and more using this WYSIWYG editor.
- D. Start Date and Time: Here you can set a specific date range for your site alert.
- E. Save Options: This saves your site alert.
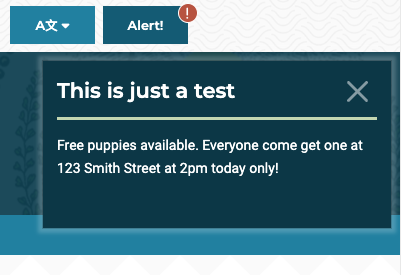
Here is what your site alert may look like when activated on the site:
Language Bar
The language bar allows you to add a button to the top sliver header bar that lets your website visitors know that you provide some non-English language support to the public. This is NOT a language translator for your website content. Rather, it lets you add text to the header drop-down that let’s readers of a specific language know how to get support and resources for their specific language.
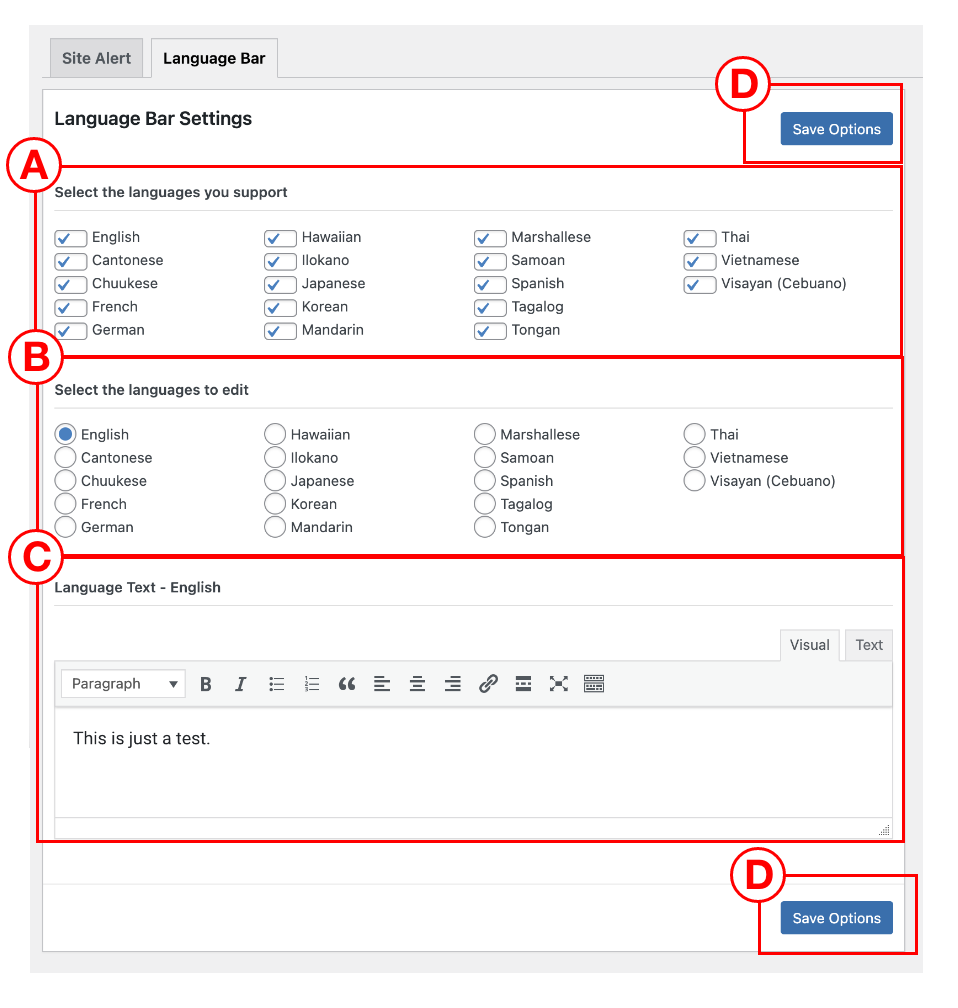
- A. Select the languages you want to support: The languages selected will have drop-down options within your language button.
- B. Select the languages to edit: When editing the text for a specific language, select the language here to change out the language text field (C).
- C. Language text: This is the content of your specific language drop down section. You can add links, style your text, and more using this WYSIWYG editor.
- D. Save options: This saves your language bar options.
If you do not have any languages selected (A), then the language toggle on the front end of your website in the header sliver bar will not show up. It only appears if you indicate that you support other languages.
Customizer
The site customizer allows you to adjust many of the site-wide content and branding elements on your website. You can use it to adjust the following:
To access the site customizer, go to Appearance > Customize. Here is how each area of the customizer works:
Site Identity
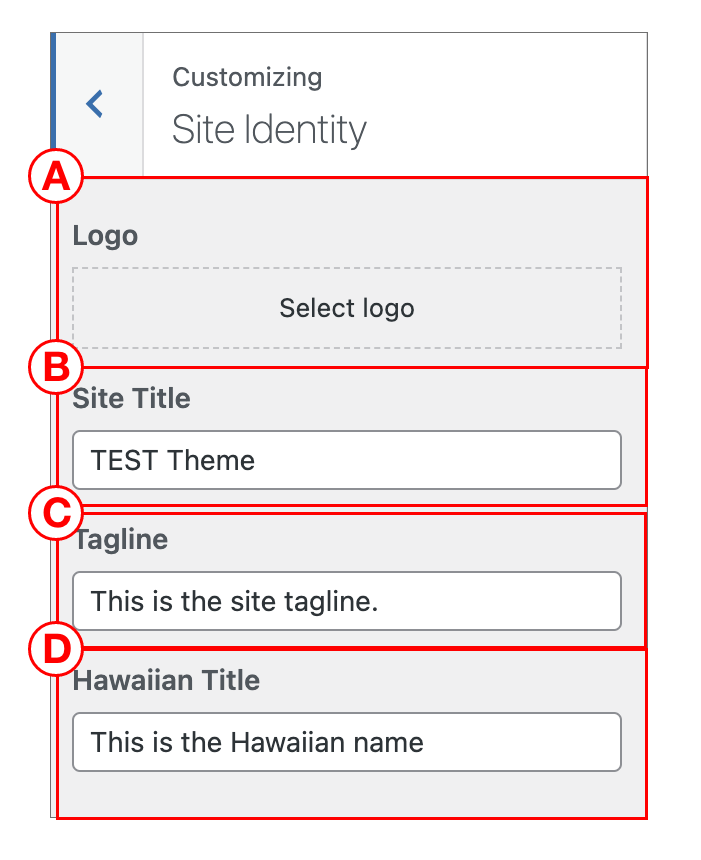
This area allows you to set your site identity information. Specifically …
- A. Logo: Set a site logo for the header to the left of your agency name. If you do not set a site logo, then the Hawaii state seal will be used by default.
- B. Site title: This is typically your agency name
- C. Tagline: If you have a tagline for your agency you can include it here (optional).
- D. Hawaiian title: This is where to put the Hawaiian language translation of your agency name.
Menus
While you can edit menus using the customizer, it is recommended to edit your menus using the administration dashboard menu area. You can learn more about editing menus for the State block template.
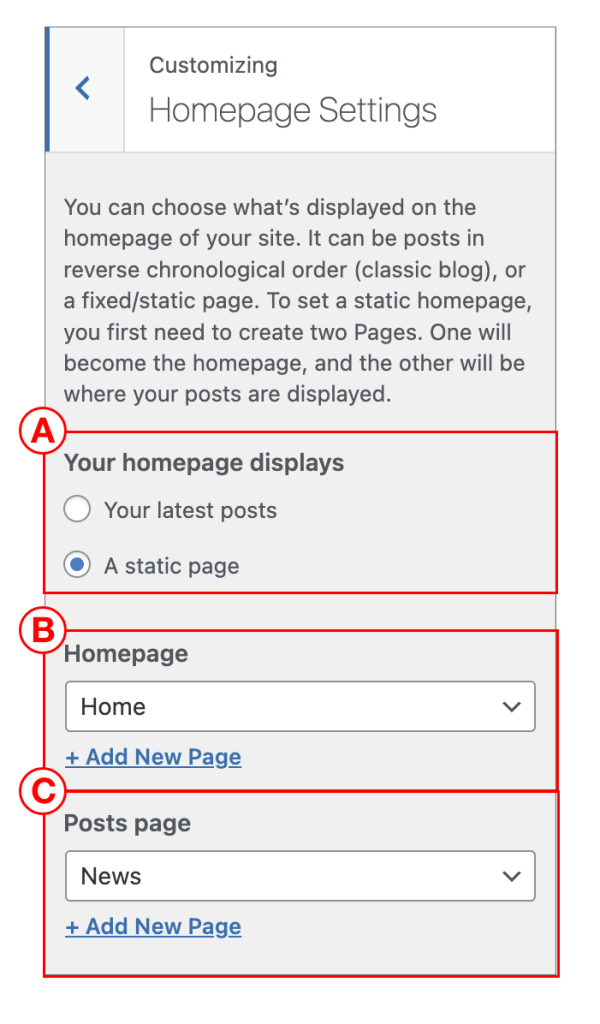
Homepage Settings
Your homepage settings specify which page is used for your site’s home page and your primary blog archive page.
- A. Your homepage displays: Do NOT adjust this field. Keep it to “A static page.”
- B. Homepage: This is your home page. You will typically not need to change this.
- C. Posts page: This is where you blog posts / articles will show up. You will typically not need to change this.
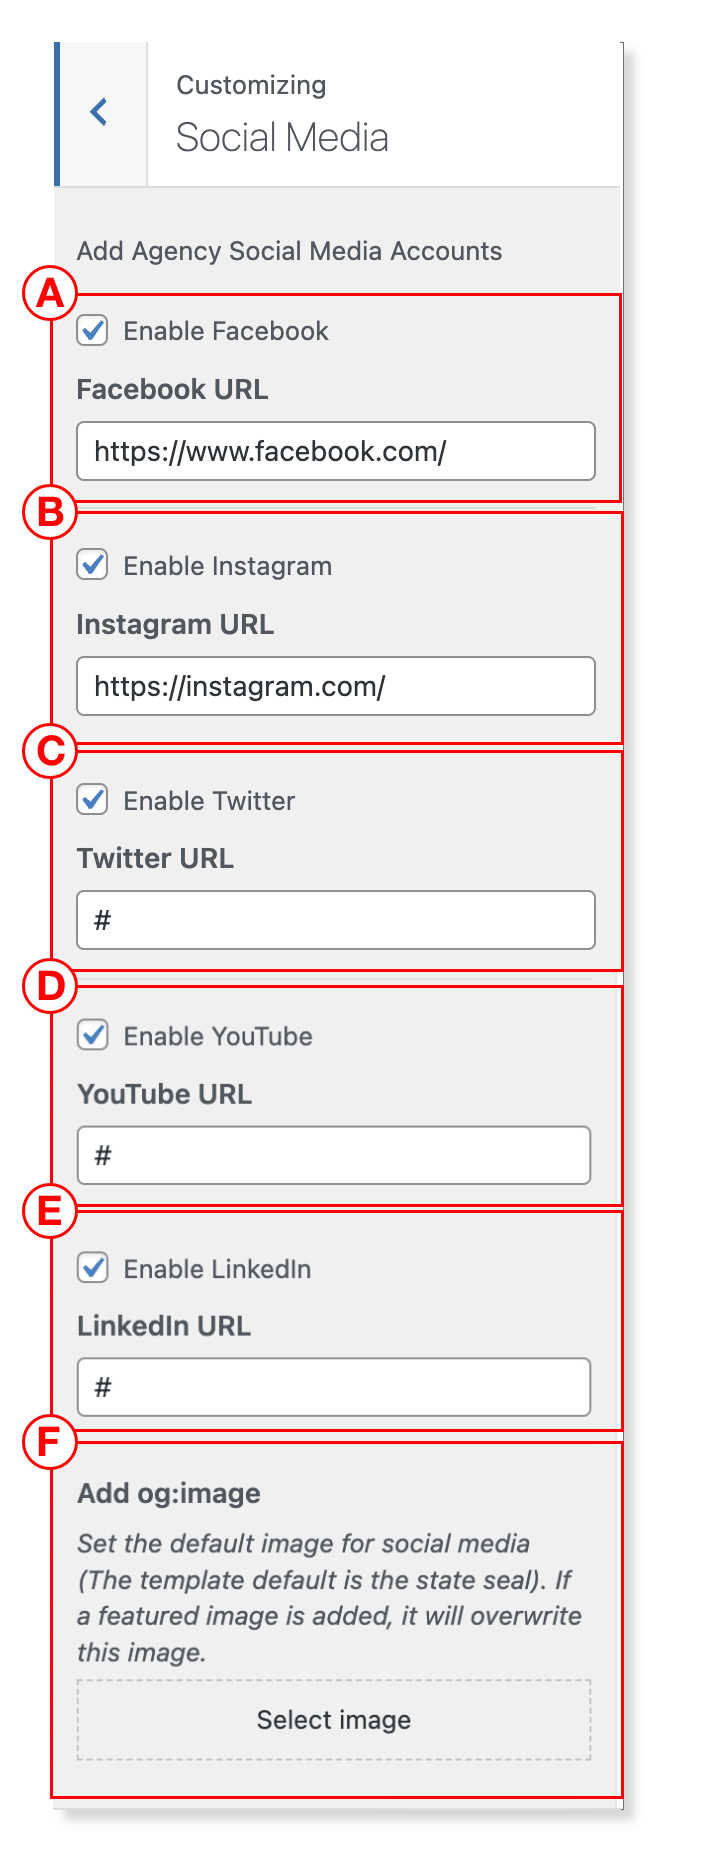
Social Media
Here you can adjust the social media links that show up in your site’s footer. For each, click the checkbox to enable the link/icon and then add in the specific URL for your social media links.
- A. Facebook
- B. Instagram
- C. X (Twitter)
- D. YouTube
- E. LinkedIn
- F. This is to edit the og:image file for social media. You will generally not need to edit this unless you know what you’re doing.
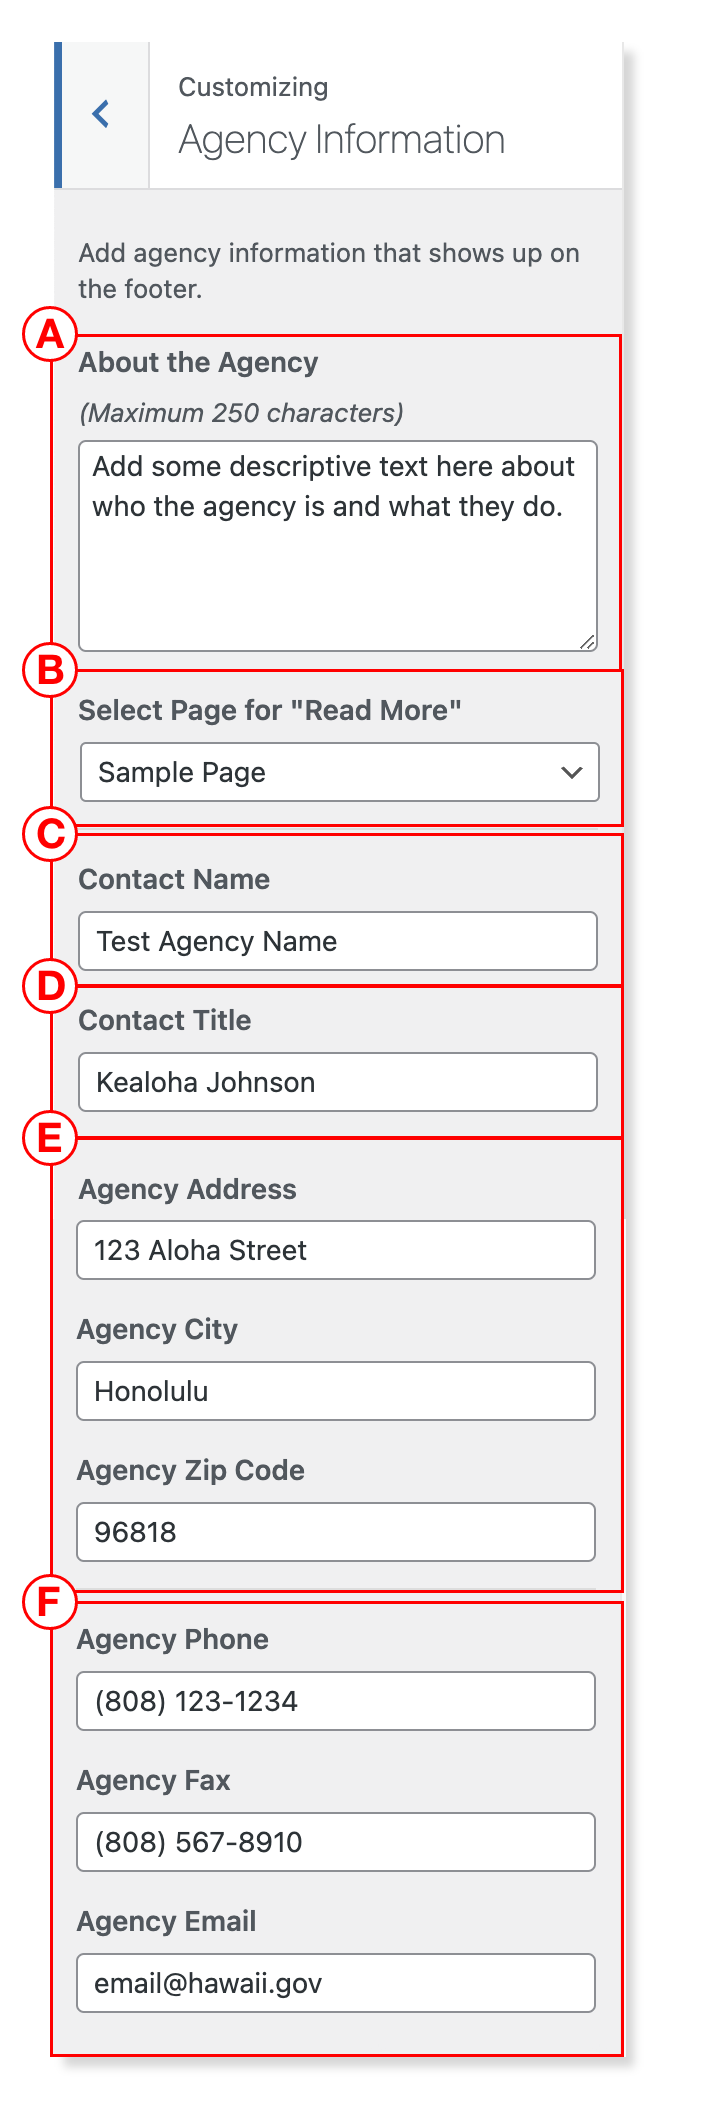
Agency Information
This area allows you to adjust the agency information that shows up across your site’s footer area.
- A. About the Agency: Add up to 250 characters to describe your agency.
- B. Select page for “Read More”: This is the page the “read more” text will link to.
- C. Contact Name: Your main contact person’s name.
- D. Contact Title: The position or title of the main contact person.
- E. Agency Address: Add in the address information / location for your agency’s office.
- F. Agency Contact Information: This is where you can add in the phone number, fax number and email address for your agency.
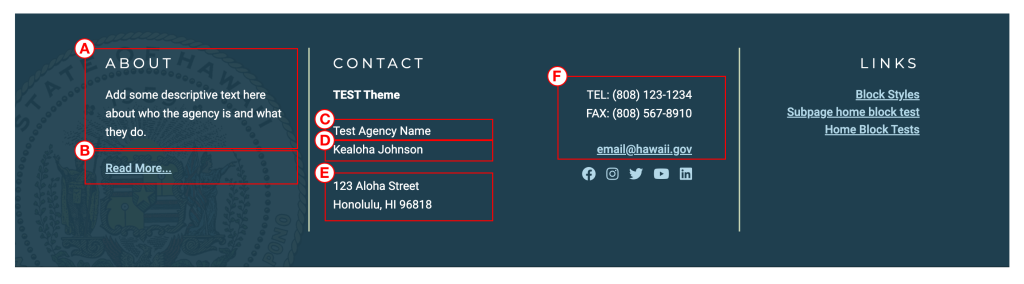
Note that if you leave a specific field empty, it will not show up on the footer.
Here is an image that shows where each of the agency information fields are shown within the site footer.
Additional CSS
It is recommended NOT to use the additional CSS options. If you require adjusting the website’s Cascading Style Sheets, please contact ETS for advice.