
Menus & Navigation
The state block template has two navigation areas where you can set up the links using the menus functionality. The first is in the header’s main navigation bar, and the second is the quick links area of the footer.
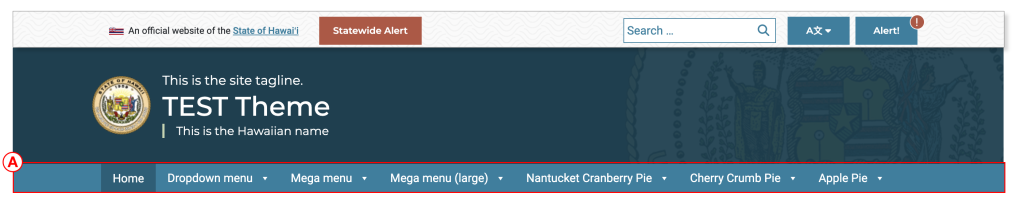
- A. Header navigation bar
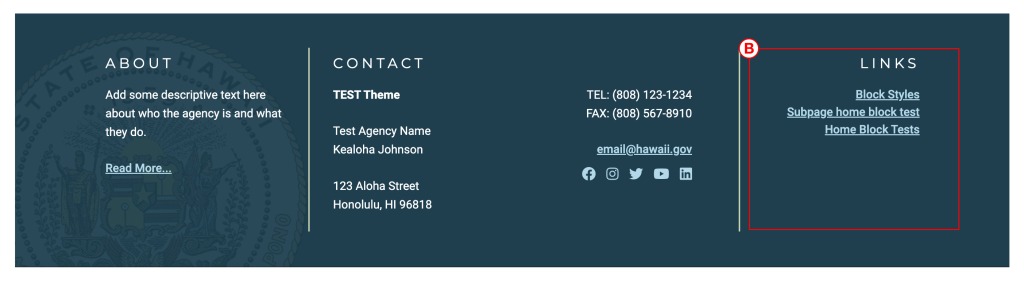
- B. Footer quick links
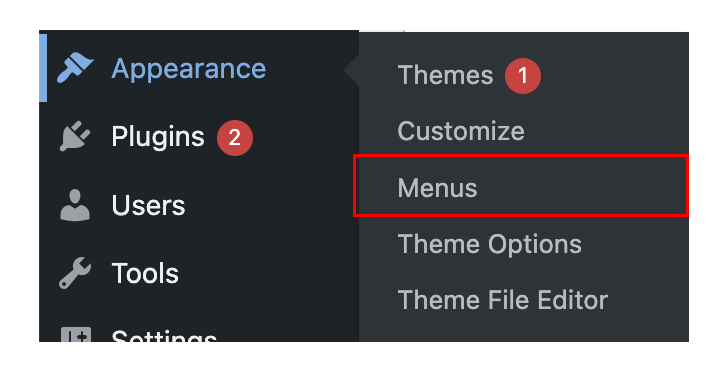
To edit either of these areas, you will use the menu functionality of the WordPress admin dashboard, located on your dashboard in Appearances > Menus.
It is worth noting that, in order to add pages or posts to your menus, you will first need to have pages and posts to add. If you need a refresher on creating pages and posts, learn how to create pages.
Creating a Menu for the Primary Navigation
If you need to review the process for creating a menu, learn how to edit menus in WordPress.
If you require a parent item for the main menu bar (for example, a category of pages “Resources” with each sub-menu item a separate resource page) then when creating a new main navigation item, add a custom link with a web address / URL of ‘#’. This allows you to create a placeholder parent menu item as a dropdown for sub-menu items.
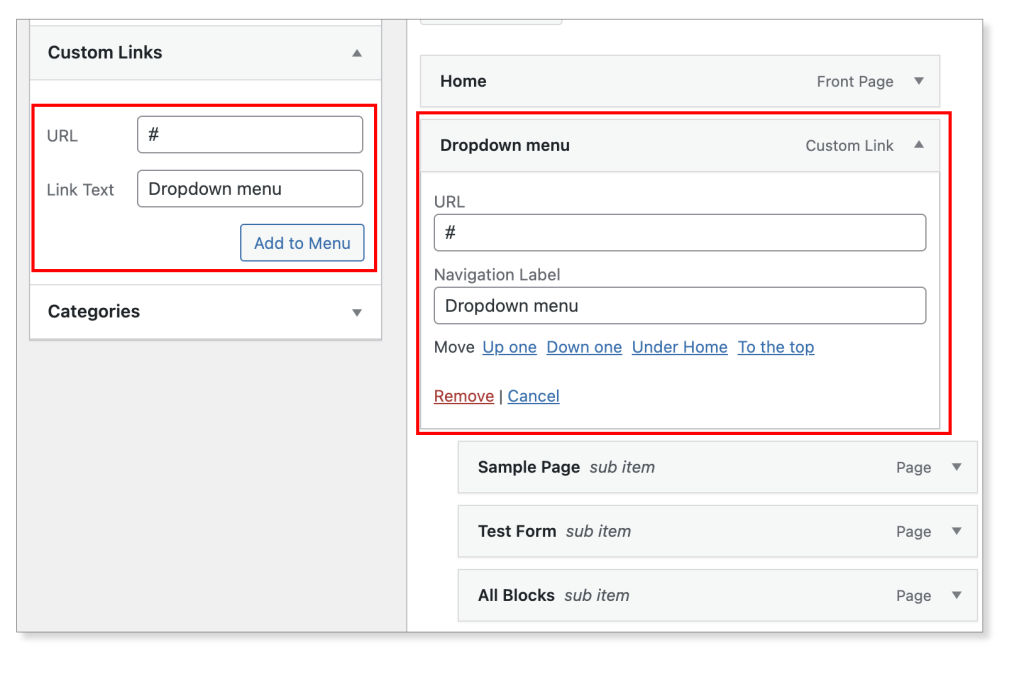
This allows the custom parent menu item to act as a dropdown, without linking off to a specific page. Otherwise the parent item will be clickable to a page and will disrupt the user experience with the navigation.
You can next any sub-pages for that dropdown menu item underneath the parent item, as shown in the image above.
Creating a Mega Menu
One of the unique options with the State Block Template is the built-in mega menu. Here are the steps to create a mega menu:
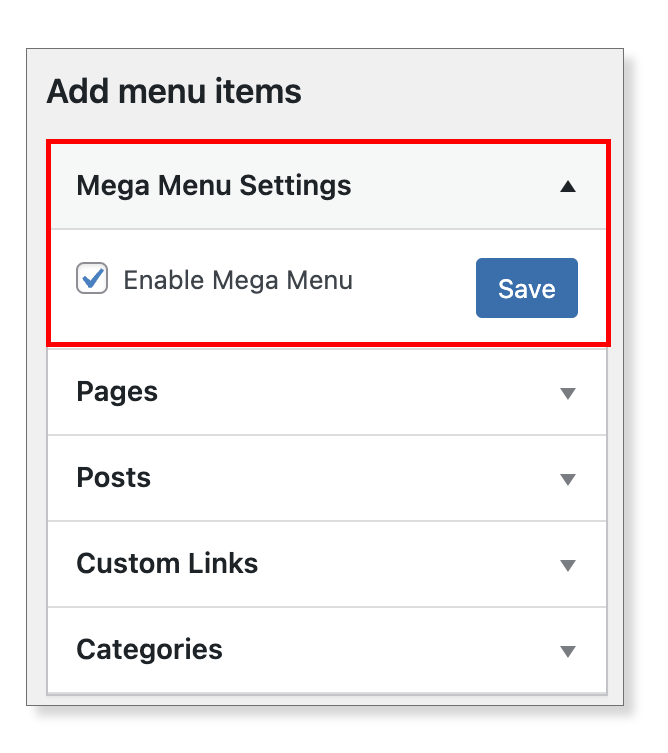
- Open the “Mega Menu Settings” option under the “Add menu items” area. Click the “Enable Mega Menu” checkbox to activate the mega menu functionality and then click “Save” to confirm.
2. Add in a “Custom Link” with a “#” address on to your menu using the method mentioned above under “creating a menu for the primary navigation”.
3. Then, save your menu using the “Save Menu” button on the bottom right of the menu admin page. This is necessary in order to activate your new menu item as a mega menu.
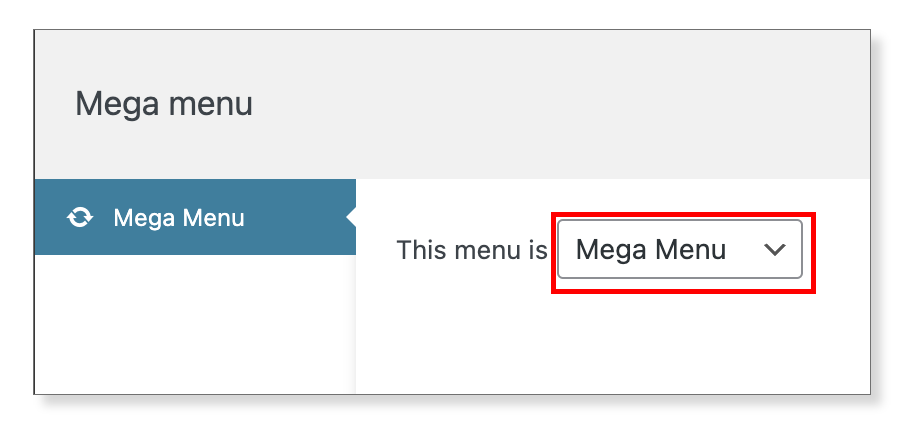
4. After your menu is saved, in the main parent (dropdown) menu item, mouse-over the menu item and click on the “Mega Menu” settings button.

5. This will open up the mega menu toggle for this menu item. In the dropdown after “This menu is…” select “Mega Menu”. Then close the modal window by clicking the “X” in the upper right corner.
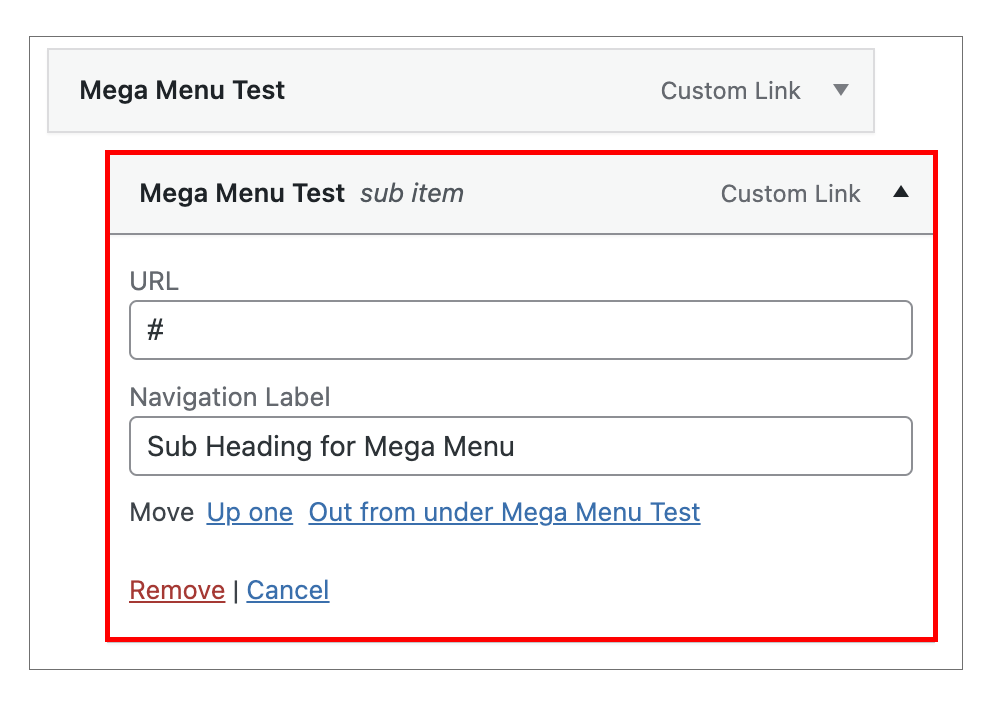
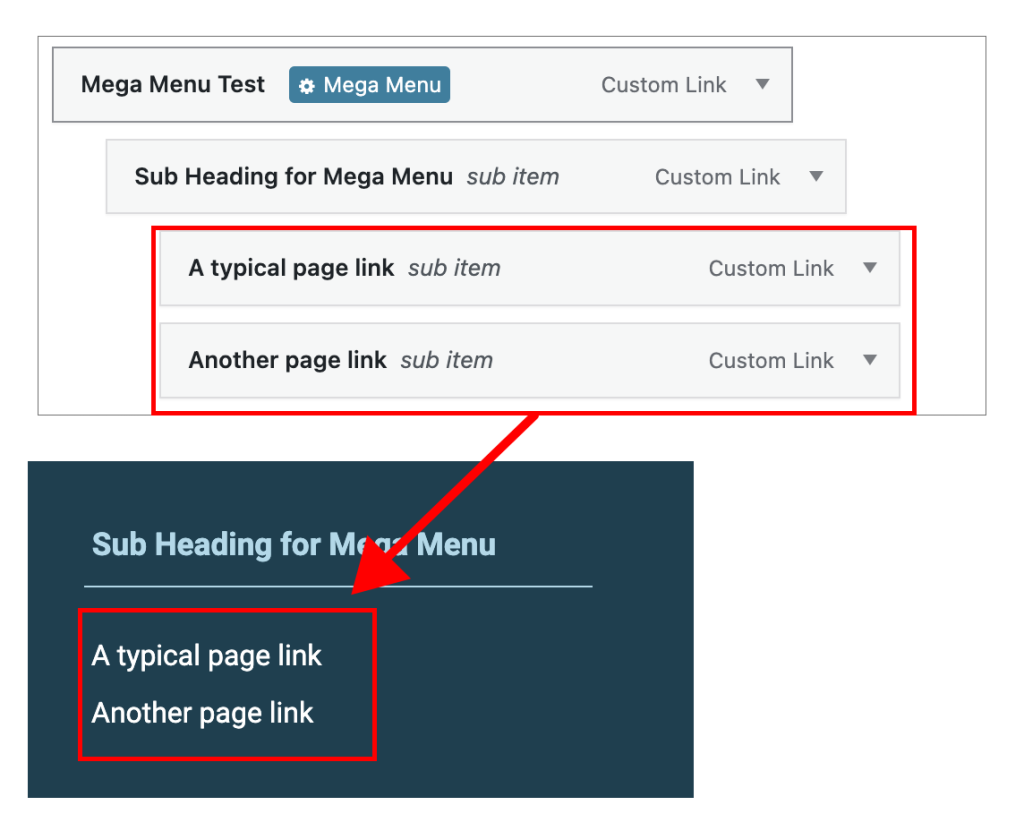
6. Any second-level menu item you add under the main mega menu dropdown will act as a “category” heading for any third-level menu items. So, to add in a sub-heading for the mega menu’s sub-menu, then add in a custom link with a ‘#’ link and your preferred title and add it as a sub-menu item under your main mega menu dropdown item.
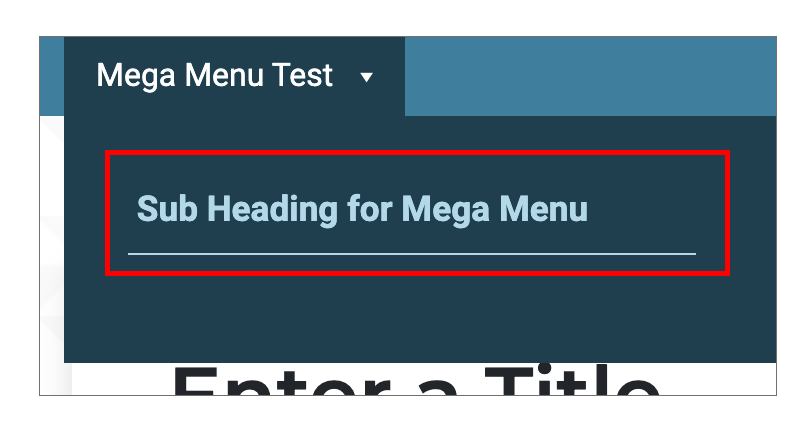
7. Then, to add in a specific menu for your mega menu’s sub-heading area, add a standard page or post link under that item in the menu structure.
When you have finished organizing your mega menu, be sure to save it and then check the main navigation on the website to confirm that it appears the way you like.
Setting Up the Footer Quick Links Menu
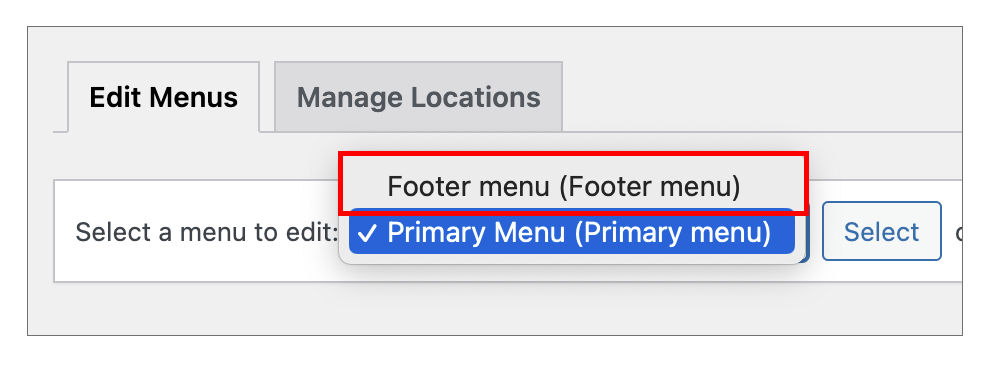
To select the footer quick links menu, go to the “Edit Menus” tab and select “Footer menu (Footer menu)” from the dropdown. Then click “Select” to edit the footer quick links menu.
The most important thing to note with the footer quick links menu is that it only includes top-level menu items. So, if you include a “child” menu, or sub-menu, it will not show up in the footer.
Other than that, creating a footer menu works the same way as creating any other standard WordPress menu. Add in your pages or posts to the menu, save the menu, and it will show up in the footer.